Chromebooks have seamlessly welcomed the world of Android applications into the Chrome operating system. The integration initially emerged in 2017. Additionally, we now have Linux support, which expands the realm of Linux application compatibility. On a Chromebook, Android is utilized to power the Play Store and nothing else. This allows you to download and install Android applications on your Chromebook. We must admit that it is not updated as frequently as Chrome OS itself.
However, if you wish to access the Android features of your system, such as Android settings and the Android version you are using on your Chromebook, follow the guide provided in this article. In this guide, we’ll explain how to check the Android version on your Chromebook.
How to Access Android Settings on Chromebook
All the latest Chromebooks have built-in Android support that powers the Google Play Store, allowing you to download and install Android applications. You can easily manage your Android applications without needing to access the Android settings.
However, if you want to access the Android features of your system, follow the steps below to do so:
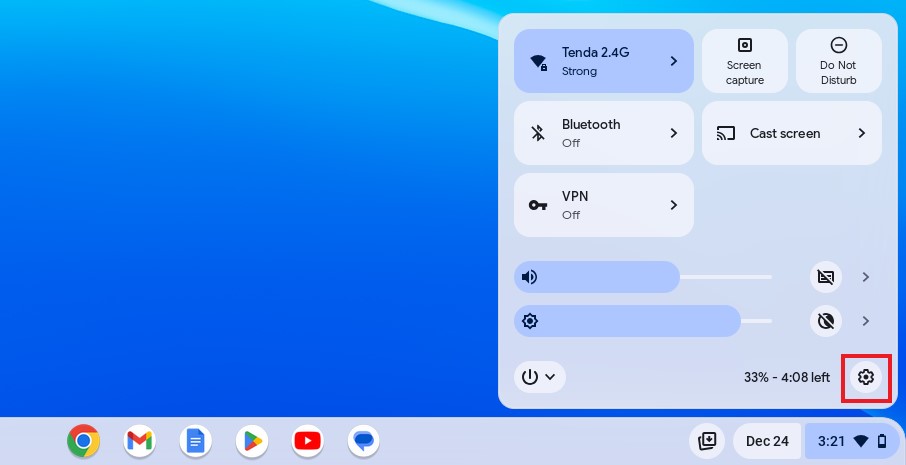
1. Click the Quick Settings Panel in the lower right corner of your screen.
2. Then click on the gear icon to open the Settings application.
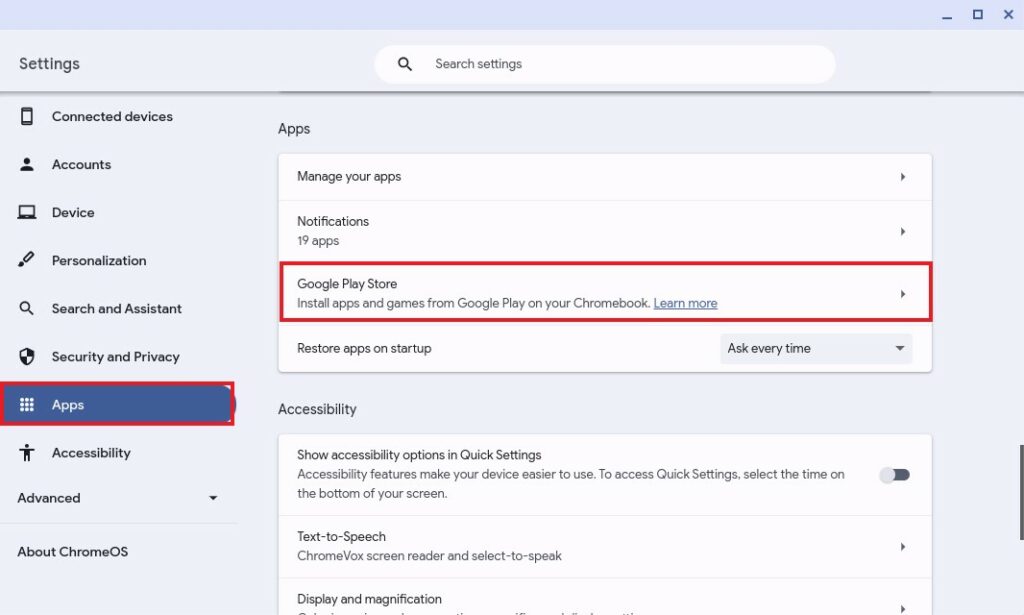
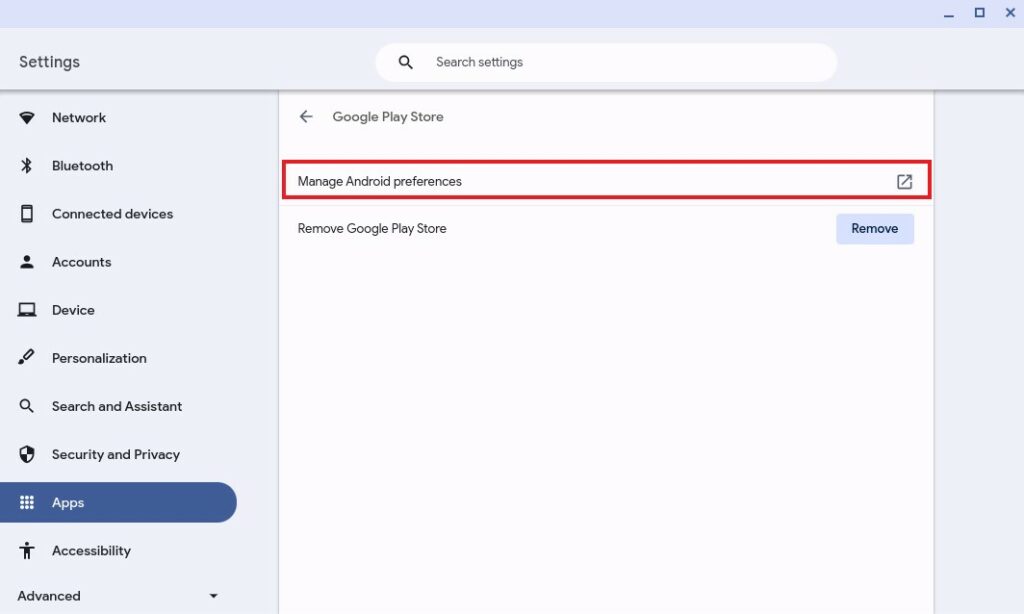
3. You’ll see the settings window. Click on the App tab located on the left side of your screen. Then select Google Play Store from the menu on the right side of your screen.
Note: You must first enable Google Play Store support on your Chromebook to access this option. Suppose you haven’t done it yet. We have a detailed guide; you can follow the guide to enable it.
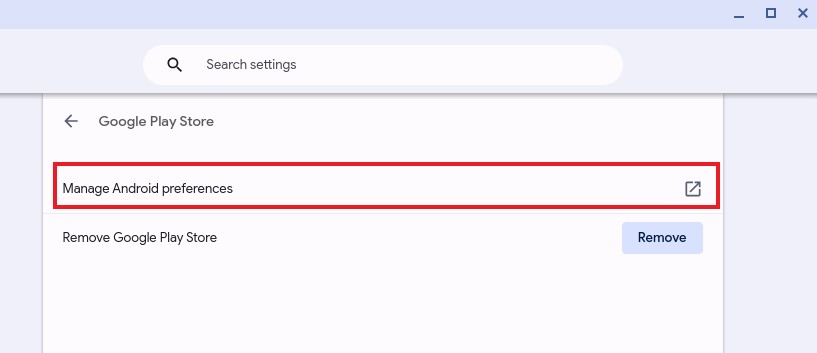
4. Click the Manage Android Preferences option to open the Android settings.
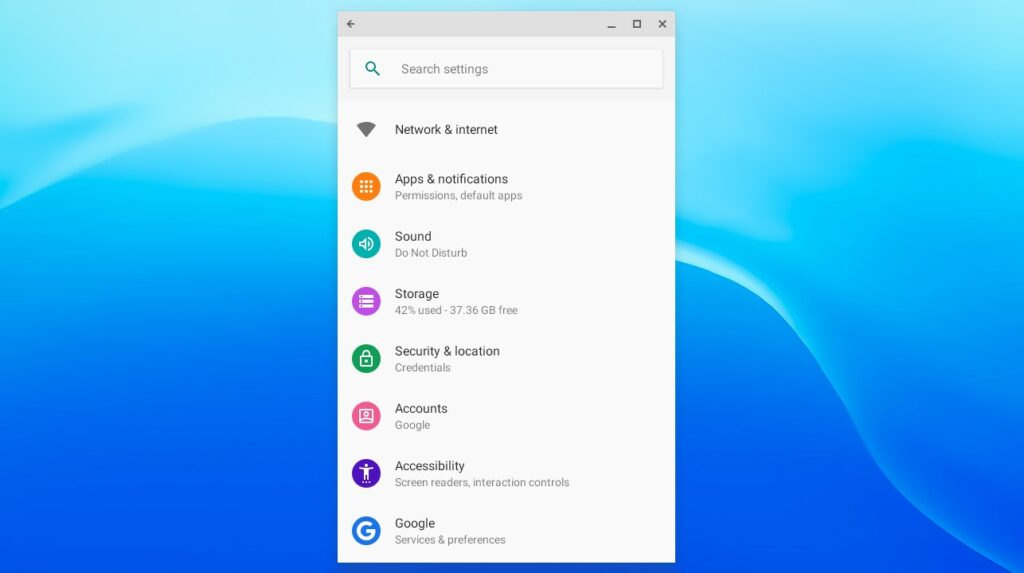
5. It will open the Android setting of your Chromebook. It is similar to a smartphone settings application. Here you get – Network & Internet, Apps & notifications, Storage, Security & location, and more. You can browse through the settings app to find the settings you are looking for.
How to Check Android Version on Chromebook
If you are wondering which Android version is installed on your Chromebook, you are at the right place. Here are the steps you can follow to find out the Android version.
1. On your Chromebook, open the Settings application.
2. Click on the App tab and select Google Play Store from the menu on the right side of your screen.
3. Click the Manage Android Preferences option to open the Android settings.
4. It will open the Android portion of your Chromebook. Here we’ll find different settings options. But we are just going to check the Android version. For that, click on the System option.

5. Click on About Device from this menu to view information about Android.

6. There you have the Android version of your Chromebook! You can also click on it to see the Android security patch level and kernel version.

Conclusion
That’s it; this is how you can check the Android version on a Chromebook. Do you also want to know your Chrome OS version? If yes, follow our linked guide on how to check the Chrome OS version on a Chromebook. By knowing both your Android and Chrome OS versions, you can ensure that you are benefiting from the latest features, security updates, and optimizations.
We hope this Chromebook guide has been helpful to you. Moreover, if you’ve any suggestions or doubts, do not hesitate to leave them in the comments section. We are always here to assist you. Your feedback is valuable, as it helps us provide you with the best possible guidance and solutions for your Chromebook experience.