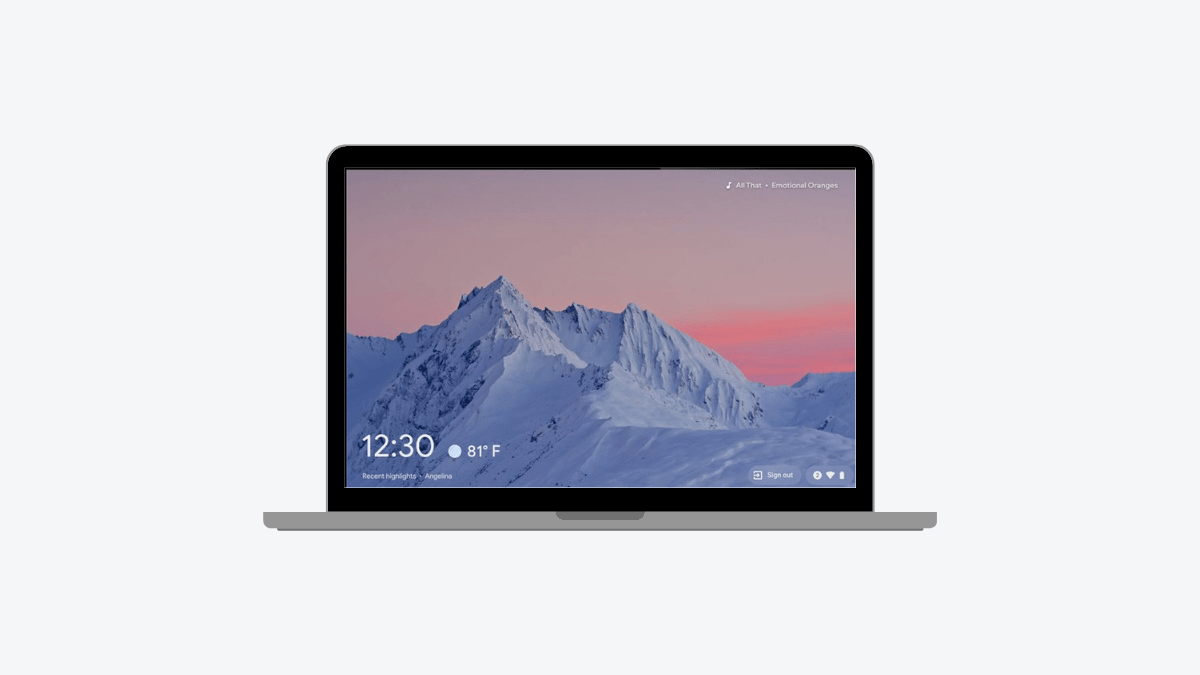
A screen saver not only enhances the aesthetics of your Chromebook but also serves as a functional tool during periods of device inactivity. While screen savers primarily contribute to a visually appealing appearance and screen concealment, they also serve as a means to display useful information. When your screen is idle, it can showcase photos, and display the current time, weather updates, and media information.
With the option to personalize your screen saver with personal photos and information, you can truly make it your own. Moreover, you have the capability to transform any Chrome OS device into a smart display when it remains unused. If you’re curious about the process of setting up a screen saver on your Chromebook, you’ve landed in the right place. Here, we’ll discuss how to set up a screen saver on your Chromebook.
How to Set up a Screen Saver on a Chromebook
In order to use the screen saver feature on your Chromebook, your device needs to have Chrome OS 88 or newer. If you’re running the older version of Chrome OS, you can update your Chromebook to the latest version available.
After that, follow the following steps to a setup screen saver on Chromebook:
1. On your desktop, right-click on the empty area.
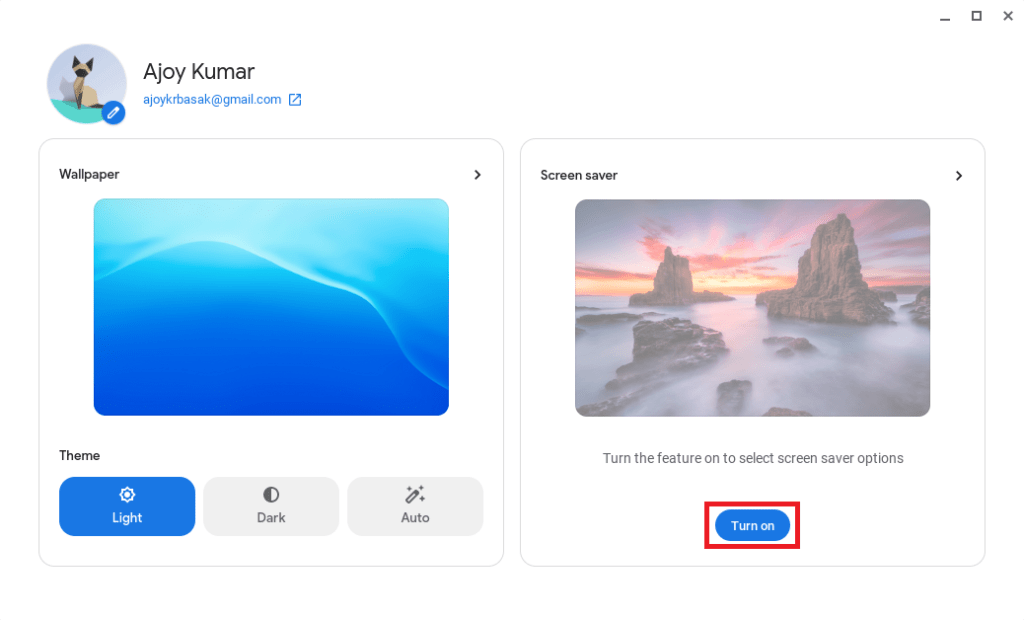
2. A menu will appear; select the Set Wallpaper & Style option from the menu.

3. This will open the wallpaper app. Here, click on the Turn On button in the Screen Saver section to enable it.
Note: From here you can also change your Chromebook background wallpaper and theme of your Chromebook.
4. To set up the screen saver, we’ve a few customization options to choose from; on the next screen. You can choose between animations like a slide show, feel the breeze, and Float on by in the Screen Saver Animation section.

5. You can also change the image source between Google Photos or Art Gallery. Each one will give you a few different albums to choose from. If you select Google Photos, you can choose from your personal albums.

6. After you’ve selected your image source, go down to the Weather section and choose Fahrenheit or Celsius.

Now you have a screen saver that resembles a Smart Display with some useful information and custom background pictures. When you’re not using your Chromebook, this should make your Chromebook look a little nicer.
Conclusion
Setting up a screen saver on your Chromebook is a creative way to add a personal touch to your device. Whether you opt for a collection of memorable photos, stunning artwork, or informative displays, the screen saver you choose will undoubtedly make your idle moments more productive by providing you with a glance at important information.
That’s it; this is how you can set up a screen saver on your Chromebook. We hope this Chromebook guide has been helpful to you. Moreover, if you’ve any doubts, feel free to leave them in the comments section. We’re always here to assist you.