Google Chrome is at the heart of Chromebook devices. While Chrome OS provides a streamlined experience, you can further enhance and personalize your Chromebook by customizing Google Chrome, the browser that powers it all. You have full control over the look and feel of Google Chrome on your Chromebook.
In this blog, we’ll explore various ways to customize Google Chrome on your Chromebook to suit your preferences. For example, you can install extensions, change the browser’s wallpaper, apply themes, and more. So, without further ado, let’s dive into it.
How to Customize Google Chrome on Chromebook
Discover the most captivating customization options that can transform your experience with Google Chrome.
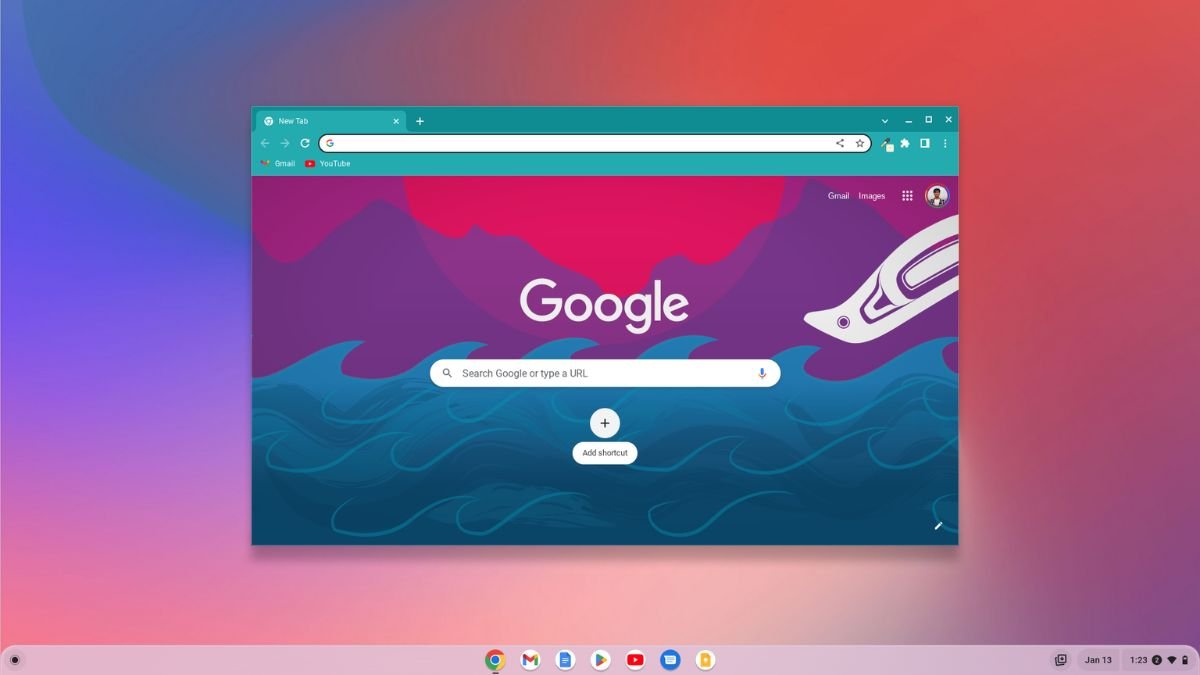
1. Change Background Wallpaper
The best way to personalize the Google Chrome homepage is by changing the background wallpaper of the browser. Here’s how you can change it:
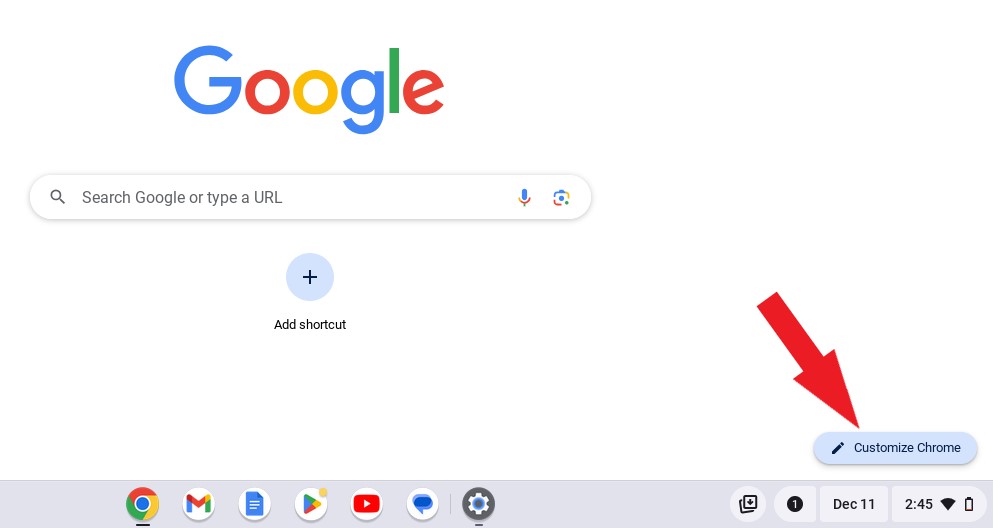
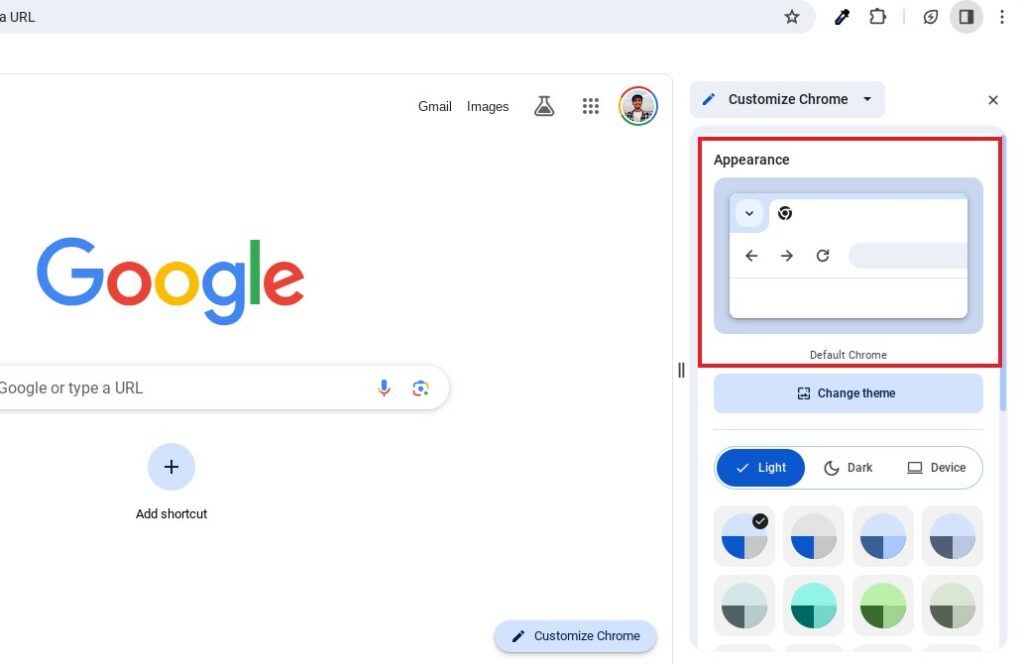
1. Click on the Home icon in the Address bar.
2. Now, click on the Customize Chrome button located at the bottom of the screen.
3. Click on the Appearance option.
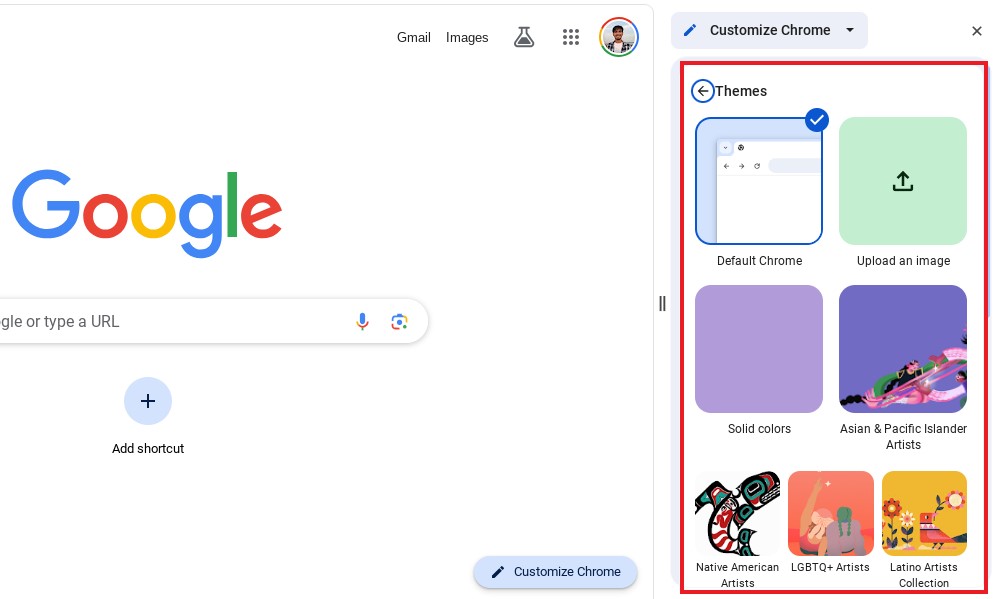
4. Select the Wallpaper Category from the list, or you can also update your images as a background.
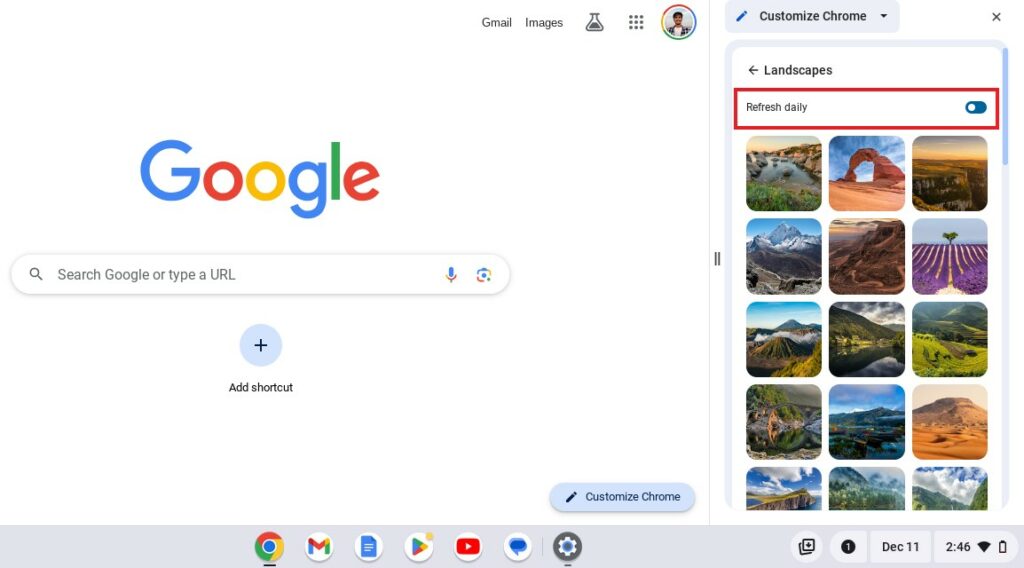
5. Now, choose the background wallpaper you want to apply. Also, if you want to refresh the wallpaper daily from the same category, you can enable the Refresh daily option.
Using the Customize Chrome option, you can also install themes. We already have a detailed guide on changing themes in Google Chrome; you can check it out.
2. Adding Extensions
Google Chrome comes with lots of unique features. However, if you want to add some extra features and enhance your browser experience, you can install extensions.
Here is how you can do so:
1. Open Google Chrome and visit the Chrome Web Store.
2. Here, look for the extensions that you want to install.
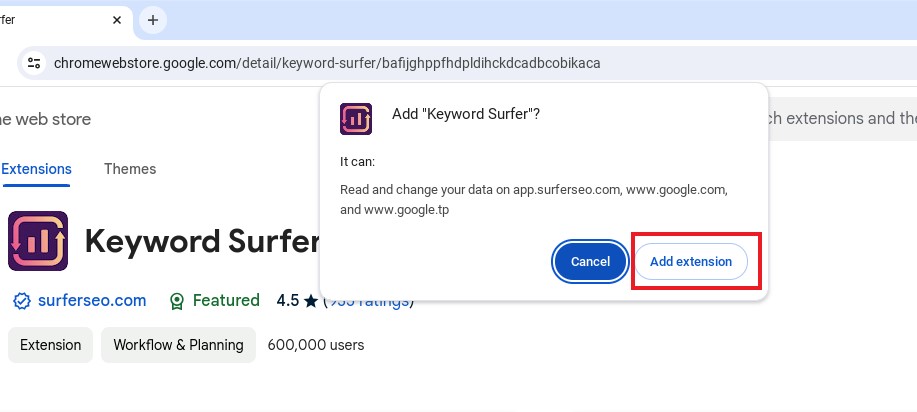
3. Then click on the Add to Chrome button.
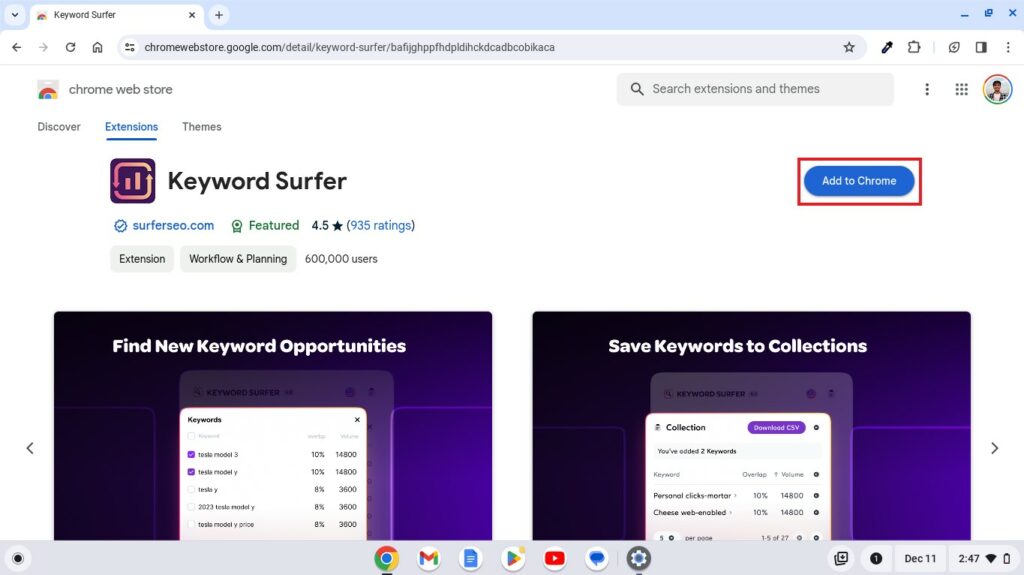
4. After that, a confirmation window will pop up. To confirm, click on the Add Extension button and wait for the installation process to complete.
That’s it! This is how you can install extensions and themes on the Chrome browser. However, if you want to learn how to manage extensions, you can follow our linked guide.
3. Change the Default Search Engine
On the Google Chrome browser, the default search engine is google.com. However, if you want to change the search engine to Bing, Yahoo, DuckDuckGo, and more, then Chrome has the option to do so.
Here are the steps you can follow to do it:
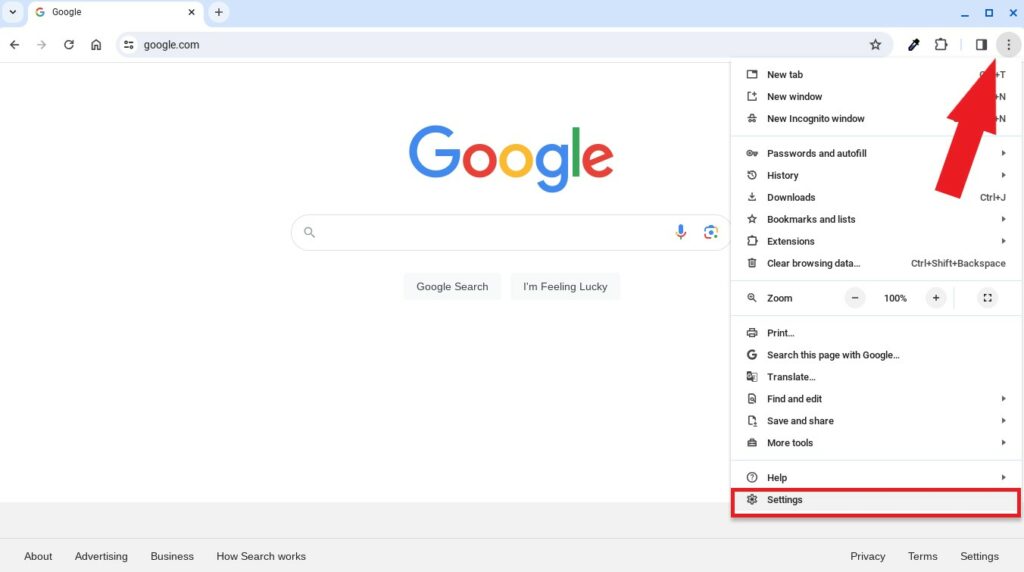
1. Open the Google Chrome browser.
2. Click on the three vertical dots in the top-right corner of the browser window and select Settings to open the Chrome browser settings page.
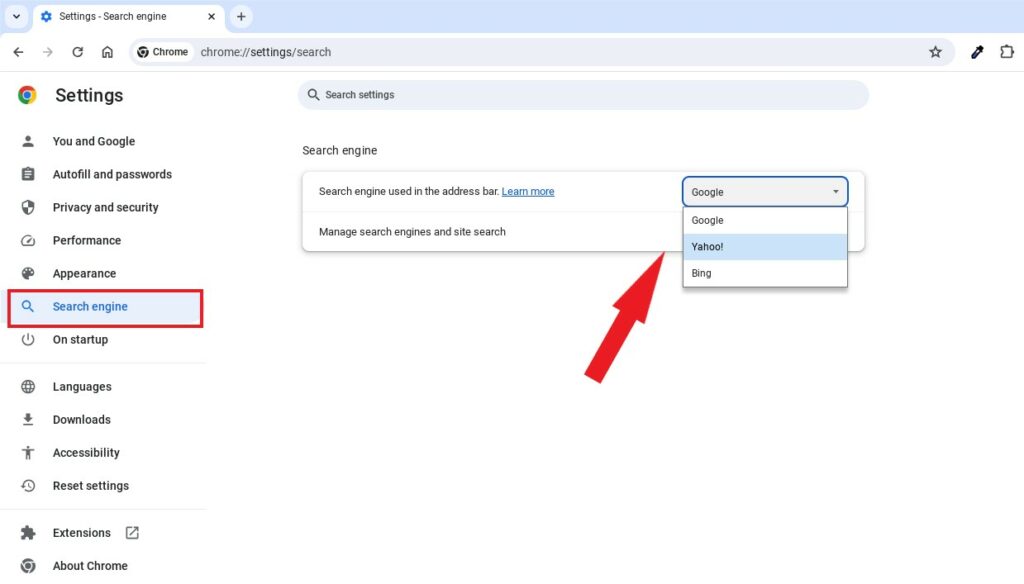
3. Then, click on the Search Engine tab.
4. Here, you’ll see an option labeled Search engine used in the address bar. Click on the drop-down menu and select your preferred search engine.
4. Change the Font in Google Chrome
Here are the simple steps you can follow to change the Font in the browser on your Chromebook:
1. Open the Chrome Settings. For that, enter this chrome://settings/
2. Now, click on the Appearance tab.
3. Here, you’ll find the Customize Fonts option, click on it to open the option.

4. Use the Font size slider to adjust the font size of your Google Chrome browser.
5. Use the font options to change your default font style, size, and font family.

Conclusion
Google Chrome is not only one of the fastest and most reliable web browsers, but it’s also a highly customizable browser. You can follow the above-mentioned steps to do so. I hope this Chrome guide was helpful to you. Moreover, if you have any suggestions or doubts, do not hesitate to leave them in the comments section. We are always there to assist you.